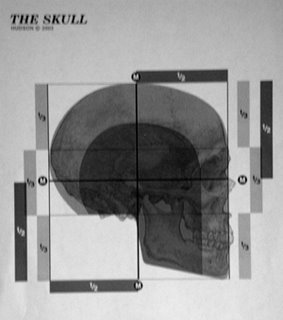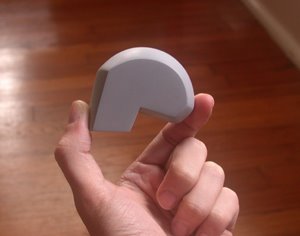
Occasionally, one might ask: "How do you draw a perfectly foreshortened character with no reference at all?" Such questions are exactly what this class is trying to address. The idea is simple: through repetition, master the 3D primitive forms of a human so that the objects can be mentally rotated and placed without the need for something to look at. In that pursuit, we have to build the primitive forms out of sculpy, so at the very least we can take these around with us, hold them up to a figure and quickly get an idea of the form without all that skin getting in the way. I spent the weekend making the head, here's the basic process:
1. Form a ball of clay as spherical as possible
2. Score a center line down the longitude
3. Score a center line down the latitude
4. Use the center line to help divide the sphere into thirds along the latitude
5. Cut out the section that goes from the bottom third to the center longitude, this is where the skull attaches to the spine
6. Add this excess to the remaining bottom section to form the chin and the front of the face
7. Hold the form by gripping the excised section. With the face pointing away from the body Cut a tapered slice from each side of the head, so that the back of the skull is wider than the front of the skull
8. Roll the face along a table to round it out
I learned a valuable trick about sculpy that is worth mentioning. You can put sculpy in the freezer to temporarily firm it up so that cuts are easier. It's always been difficult to cut a ball of clay without squishing it in the process. When the clay thaws out you can put it right back in to the freezer, just make sure it's at room temperature before baking it. I did bake it, and then I realized that the jaw was much longer than it should have been. Unfortunately, that meant I had to take a hack saw to my perfectly modeled and sanded form. It was painstaking. After almost an entire can of spray paint and a few packages of sandpaper, here's the final product:


No comments:
Post a Comment